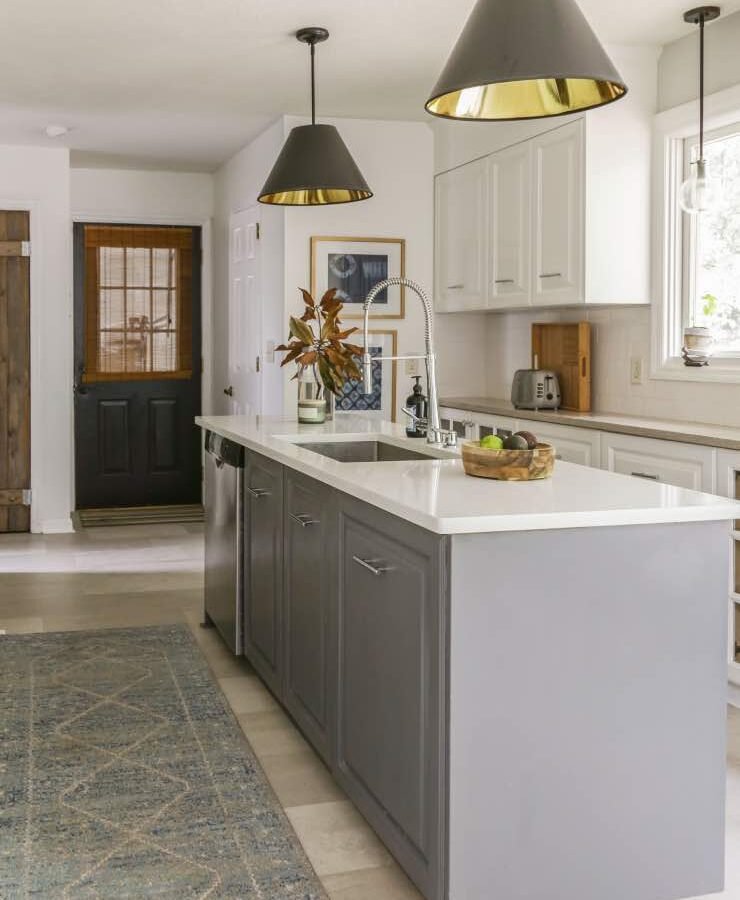
Sanding kitchen cabinets is the worst part of refinishing: the dust everywhere, the hours of tedious work, the sore arms. It’s also the step that makes most people abandon the project entirely. I refinished my kitchen cabinets twice, once with sanding and once without, and the no-sand method looked just as good with a third of the effort.
Here’s how to refinish kitchen cabinets without sanding them down. The secret is chemistry replacing elbow grease: liquid deglossers and bonding primers do the adhesion work that sanding used to do.
Refinish Kitchen Cabinets Without Sanding Them Down: The Method
The process replaces sanding with two chemical steps. First, clean thoroughly with a degreaser like TSP substitute; kitchen cabinets accumulate invisible cooking grease that prevents adhesion, and no primer sticks to grease. Scrub every surface, rinse, and let dry completely. This cleaning step matters more than anything else in no-sand refinishing.
Second, apply a liquid deglosser (also called liquid sandpaper). Wipe it on with a rag, following the product’s dwell time, and it chemically etches the existing finish, creating a surface new paint can grip. Then apply a high-adhesion bonding primer, which is specifically formulated to stick to glossy, hard-to-paint surfaces. These two products together replace hours of sanding.
- Degrease meticulously. TSP substitute, scrubbed into every surface. Grease is the #1 cause of no-sand failures.
- Apply liquid deglosser. $12-$15 per quart. Wipe on, let dwell per instructions, wipe off. It etches the old finish chemically.
- Use bonding primer. $25-$35 per gallon. Formulated to grip glossy surfaces where regular primer fails.
- Don’t skip the rinse. After degreasing, wipe with clean water. Residue interferes with deglosser and primer.
- Work in ventilation. Deglossers have strong fumes. Open windows, use fans, wear a respirator.
- Test adhesion first. Prime one door, let cure 24 hours, then scratch-test. If it holds, proceed with confidence.
Painting for a Factory-Like Finish
With prep done, the topcoat determines the final look. Use a cabinet-specific enamel paint: acrylic-alkyd hybrids or urethane-modified enamels cure to a hard, smooth finish that resists the daily abuse kitchens dish out. Apply with a high-density foam roller for flat areas and a quality synthetic brush for details, or rent a paint sprayer ($50/day) for the smoothest possible finish.
Two thin coats beat one thick coat every time. Thin coats level better, dry harder, and resist drips. Let the first coat dry fully (follow the can’s recoat time, usually 4-6 hours), then apply the second. Then comes the hard part: waiting. Enamel paint feels dry in hours but takes 2-3 weeks to fully cure. Treat cabinets gently during this period.
- Use cabinet enamel. Urethane-modified or acrylic-alkyd formulas cure harder than wall paint. Worth the premium.
- Two thin coats. Better leveling, fewer drips, harder finish than one thick coat. Patience pays.
- Consider spraying. A rented sprayer ($50/day) gives the smoothest finish. Practice on cardboard first.
- Remove doors and hardware. Label everything with tape. Paint doors flat on sawhorses for best results.
- Respect cure time. 2-3 weeks to full hardness. Gentle use during curing prevents chips and dents.
- Upgrade hardware too. New knobs and pulls ($2-$5 each) complete the transformation for minimal extra cost.
When No-Sand Won’t Work
Honesty matters: no-sand refinishing has limits. If the existing finish is peeling, flaking, or damaged, no chemical bonds to a failing surface; loose finish must be scraped and the edges feathered with light sanding. Deep scratches, dents, and water damage need filling and spot-sanding regardless of method.
Also, dramatic transformations (dark stain to white paint) may need extra primer coats, and the results depend heavily on the existing finish type. Wax-finished cabinets need the wax fully stripped (mineral spirits) before anything else adheres. When in doubt, test your full system on the back of one door before committing to the whole kitchen.
- Peeling finish must be scraped. No product bonds to failing paint. Scrape loose areas and feather edges.
- Fill damage first. Wood filler for dents and scratches, spot-sanded smooth. Paint doesn’t hide damage.
- Strip wax finishes. Mineral spirits remove wax that blocks all adhesion. Test by dripping water; beading means wax.
- Extra primer for dark-to-light. Budget an additional primer coat when covering dark finishes with light paint.
- Test the full system. Back of one door: clean, degloss, prime, paint, cure, scratch-test. Confirm before the full job.
- Know when to sand anyway. Badly damaged cabinets need traditional prep. No-sand is for sound finishes, not wrecked ones.
Frequently Asked Questions
Does liquid sandpaper really work on cabinets?
Yes, when combined with thorough degreasing and a bonding primer. Liquid deglossers chemically etch glossy finishes so primer can grip. It’s a proven system used by professional painters.
How long do no-sand refinished cabinets last?
5-10 years with proper prep and quality enamel paint, comparable to sanded refinishing. The prep quality (especially degreasing) determines longevity more than the sanding question.
Can I use chalk paint instead of sanding?
Chalk paint adheres well without sanding and needs only cleaning first. It gives a matte, vintage look and requires wax or topcoat sealing. It’s a valid no-sand option with a different aesthetic.
Maintaining Your Results Long-Term
The project isn’t finished when it’s done; it’s finished when you’ve set up the maintenance that keeps it looking done. Most home improvements fail slowly through neglect, not dramatically through defects. A tiny maintenance habit preserves your work for years.
- Schedule a 6-month check. Half a year after any project, inspect your work. Catching small issues early keeps them small.
- Keep leftover materials. Labeled paint cans, spare tiles, extra fasteners: future repairs take minutes instead of store trips.
- Write down what you did. Products used, colors, techniques. Future you won’t remember, and the notes save hours.
- Clean, don’t just admire. Most finishes last years longer with basic cleaning. Dirt and grime are what actually wear things out.
- Go deeper: Always follow EPA lead-safe work practices for authoritative detail on this topic.
The bottom line: Refinishing kitchen cabinets without sanding works when you replace mechanical abrasion with chemistry: meticulous degreasing, liquid deglosser, bonding primer, and quality cabinet enamel. It’s faster, cleaner, and produces results that rival sanded refinishing on sound existing finishes. Save the sandpaper for cabinets that are actually damaged.



One thought on “How to Refinish Kitchen Cabinets Without Sanding”